Starting DWC Plants
No Dirt Plant Propagation
Starting DWC plants is a rewarding and relatively easy process. When you start your own plant genetics for deep water culture (DWC) gardening, you can select genetics that are special to you–there are so many amazing types of plants that can be grown in DWC it’s tough deciding where to begin! Additionally, when starting new plants from seed for direct transplant into the HydroBucket for growing to maturity, the plants will start off free of troubles–no insects or diseases.
TIP: growing in DWC makes it easier to maintain a hygienic growing environment as there is no soil for pests and pathogens to set up shop in.
The HydroBucket design makes transplanting a tidy affair: the HydroPod snaps securely into the HydroLid on top of the HydroBucket. With a neoprene collar this supports plants big or small in the system without the need for grow rocks, etc to anchor plants in place. When starting DWC plants from seed, a HydroPlug is ideal. Also note that cuttings may be rooted in HydroPlugs for transplant into the system–but for today, let’s keep the focus on seeds.
What is a HydroPlug?
In essence it’s a relatively inert “sponge-like”’ material that holds the right balance of air to moisture, i.e. enough moisture for seeds to germinate while not becoming waterlogged, which could invite problems like damping-off. The plug itself is relatively small and fits perfectly with the HydroPod plant support. Of further benefit is that it is compostable once you’ve harvested your crop and are cleaning up to get ready for your next crop.
Starting DWC Plants
HydroBucket’s co-founder and inhouse water culture growing guru Mitchell has developed an easy and sure-fire method for starting DWC plants via seeding into HydroPlugs. Aside from the HydroPod used in the HydroBucket system and HydroPlug the only extra material needed is an opaque plastic cup that’s roughly the same size at the top as the HyroPod with a little extra room below. To see how it’s done first hand, you can see Mitchell’s video HERE.
In a healthy propagation environment, the HydroPlug should stay moist for seed germination and early plant development for a few days in between waterings, although this can vary from setup to setup.

The goal here is to have a healthy shoot emerging up top and root tips emerging below, after poking through the HydroPod. The trick is supporting the HydroPod with HydroPlug slightly above a depth of fresh pH adjusted water or mild nutrient solution; far superior to sitting flat on trays. To accommodate this, the right sized plastic cup can do a perfect job–see the VIDEO

Keeping the HydroPlug moist is easy–just hand water into the HydroPod with plug as necessary. Any excess will collect in the cup, which you can pour into your favorite potted houseplant, etc. By keeping an eye on the water level in the cup, it’s easy to maintain the perfect depth to coax root development.

Once seedlings have sufficient roots below and are tall enough to expose shoots above the neoprene collar once inserted, the deep water culture seedling is ready for planting into the HydroBucket and begin receiving crop fertilizer like Cultured Solutions.
Additional DWC Plant Propagation Tips:
Add UC Roots as recommended to help keep water and HydroPlugs free of funk in warm and moist environments
Use a humidifier and control to help keep Relative Humidity 70 to 80% for propagation and while establishing young plants
Raise lighting systems high up or use a dimmer if available); too much light too soon can fry tender young seedlings
Avoid direct air movement over germination medium or with tender young seedlings; it may dry out or stress them
Start with the best seeds available to you; in the case of heirloom veggies and fruits you may keep seed from the previous crop and plant again
Start Indoor Growing Today!
-
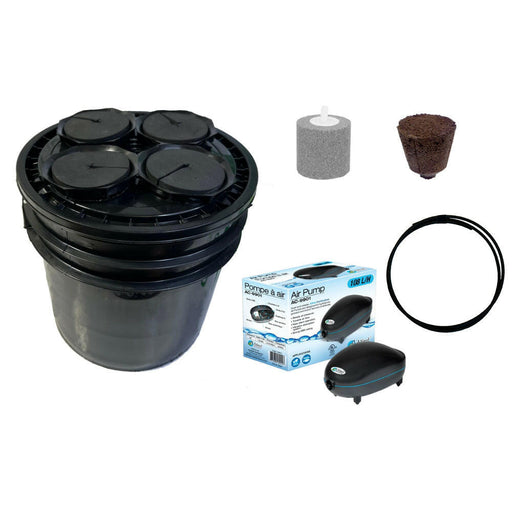
HydroCombo
Visionary HydroponicsOriginal price $84.50Original price $84.50 - Original price $84.50Original price $84.50Current price $67.60$67.60 - $67.60Current price $67.60Maximize your hydroponic gardening efficiency with the HydroCombo, an all-in-one solution for your Deep Water Culture needs. This high-quality comb...
View full detailsOriginal price $84.50Original price $84.50 - Original price $84.50Original price $84.50Current price $67.60$67.60 - $67.60Current price $67.60Sold out -
HydroSeed
Visionary HydroponicsOriginal price $62.98Original price $62.98 - Original price $62.98Original price $62.98Current price $50.38$50.38 - $50.38Current price $50.38Simplify Starting Your Hydroponics Seedlings Introducing the HydroSeed, our all-in-one solution to go from seed to harvest effortlessly, and cultiv...
View full detailsOriginal price $62.98Original price $62.98 - Original price $62.98Original price $62.98Current price $50.38$50.38 - $50.38Current price $50.38Save 20% -
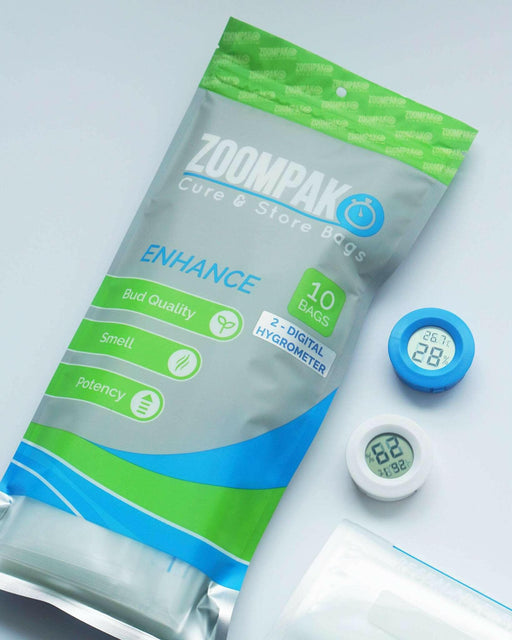
ZoomPak Cure & Store 1/2lb Bags
Visionary HydroponicsOriginal price $39.96Original price $39.96 - Original price $39.96Original price $39.96Current price $31.97$31.97 - $31.97Current price $31.97ZoomPak Cure & Store 1/2lb Bags - 10 Pack The ZoomPak Cure & Store Bags are designed for the discerning horticulturist seeking to pre...
View full detailsOriginal price $39.96Original price $39.96 - Original price $39.96Original price $39.96Current price $31.97$31.97 - $31.97Current price $31.97Save 20% -
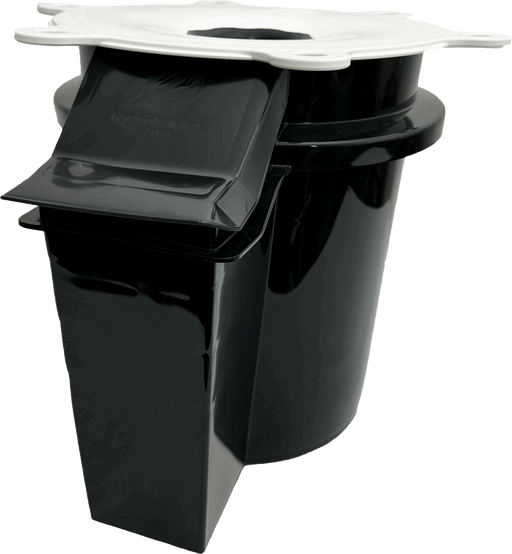
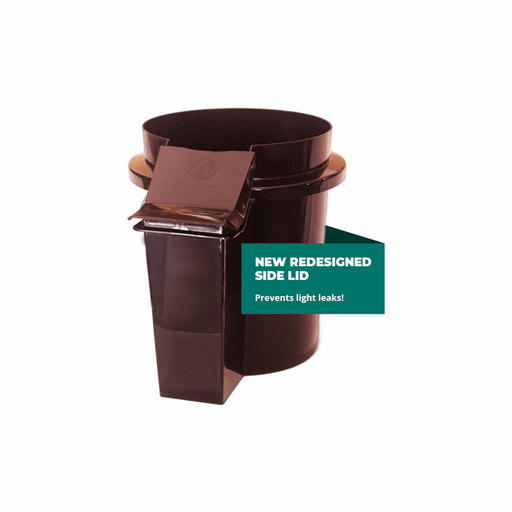
HydroBucket
Visionary HydroponicsOriginal price $39.74Original price $39.74 - Original price $39.74Original price $39.74Current price $31.79$31.79 - $31.79Current price $31.79HydroBucket is the answer to your Deep Water Culture hydroponics needs.It streamlines your home growing experience, allowing you to focus on nurtur...
View full detailsOriginal price $39.74Original price $39.74 - Original price $39.74Original price $39.74Current price $31.79$31.79 - $31.79Current price $31.79Sold out -
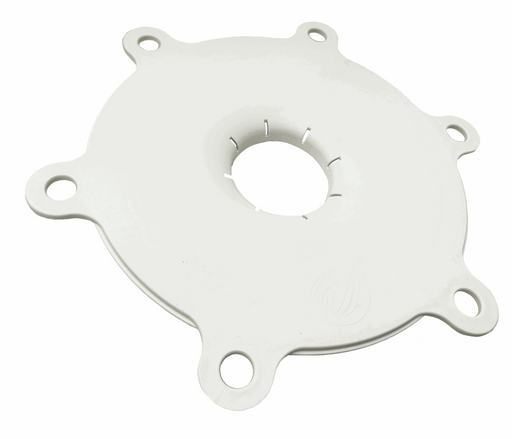
HydroLid
Visionary HydroponicsOriginal price $35.95Original price $35.95 - Original price $35.95Original price $35.95Current price $28.76$28.76 - $28.76Current price $28.76Premium Quality Hydroponic Lid for Optimal Fluid Movement and Plant Support The HydroLid is your essential tool for achieving optimal hydroponic gr...
View full detailsOriginal price $35.95Original price $35.95 - Original price $35.95Original price $35.95Current price $28.76$28.76 - $28.76Current price $28.76Sold out